


Like most of our customers, you want attention-grabbing product photos that stand out from the rest. Whether you’re shooting on a DSLR or your phone, a lighting setup is a key ingredient for the best images.
There are an array of studio lights and modifiers out there. This guide takes you through what kind of gear you’ll need and how to use it. We’ll look at things like affordability, power, and versatility.
From a small sunlit corner to a purpose-built studio setup, read on to find out what will work best for you.
Natural Lighting for Product Photography at Home

If you’re just starting out in eCommerce, wanting to showcase your small business for the first time, or learning about still-life photography, you can find the right lighting for product photography at home.
Find your best shooting time
To find the time of day when your light is best, set up a simple scene and take a photo every hour during the times you're available to shoot. Compare the photos and choose the time when your whites look the whitest (in other words, when the white areas aren't skewing blue or yellow) and you like the look of the shadows.
Diffuse the light
To soften and reduce shadows, you can "diffuse" the light. There are many ways to diffuse sunlight, but a simple white sheet over the light source may be all that you need. You can also hang translucent white curtains or use the shear "scrim" that comes in a 5-in-1 reflector set (pictured here).

Add a reflector
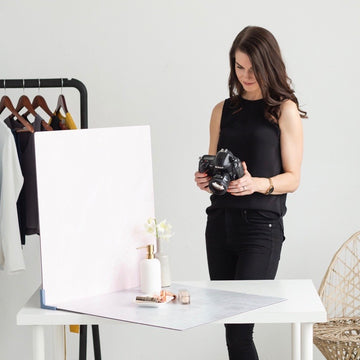
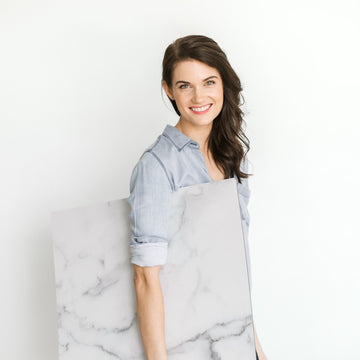
To further reduce shadows and brighten your photo, use a "reflector". A reflector is anything white you place opposite your light source to reflect light onto the far side of your scene. You can use white foam core, a trifold poster board, or even a white-based Surface like I'm using in this photo. And it doesn't have to be pure white to work. If you own a white-based Surface like White Marble or Subway Tile and aren't using it in your scene, it makes a great reflector too!

Use a mobile studio
Of course, natural light is NATURAL, so your photoshoot light will depend on the time of day, season, and the weather.
This is made much easier if you have a mobile photo studio. That way you can use your choice of backdrop and roll the Studio anywhere you need to to find the best light in your space. This is our Replica Studio, and it's also height adjustable for taking both eye level and flat lay photos (and for sparing your back)!

Here are some tips for using natural lighting:
- Avoid direct sunlight, unless you WANT dramatic shadows. It will cast hard shadows and the lit side of your subject will be overexposed. For soft shadows, choose a time of day when the sun is overhead rather than shining directly through the window.
- Take advantage of overcast or cloudy days. These conditions create more diffuse lighting.
- If you’re in direct sunlight, a solution is to use a thin white sheet over the window. The sheet will act as a diffuser, softening the light.
- Use a reflector. Sunlight hitting your subject on one side is going to create shadows on the opposite side. Use a reflector on the opposite side to even out the light for a more fully lit product.
- Be creative with the angle of your reflector. Shadows can be crafted to suit your style. A reflector can be as simple as a sheet of white poster board.
Basics of Studio Lighting for Product Photography
We love natural sunlight for photography, but sometimes want greater control when shooting products. If you're need to lighting products with artificial lighting, a single continuous soft box light and a reflector are great places to start. If you're fortunate to have a dedicated photo studio (a spare room counts), a three-point lighting setup is likely your best setup.
A three-point lighting setup
Your scene is going to be lit by a primary “key” light. This is the main light source pointing directly at your product from the front. Alone, this is going to create a very contrasted and unnatural image.
A second “fill” light removes this contrast. The fill light is placed somewhere on the opposite side of the product to fill in the shadows.
A third “back” light is placed somewhere behind the subject. Backlighting separates the subject from the background. It has the potential to create the halo effect often seen in portraits.
You’ll fall short of this well-rounded approach if you don’t have multiple light sources. But their absence can be made up for with the use of reflectors.
Studio Lights for Product Photography
There are two main types of artificial lights used in photography. These are continuous lights and external flashes. It is going to depend on a few things whether you want to invest in one or the other.
Are you a beginner or advanced photographer? What is your budget? Are you shooting still-life or motion shots?
Continuous Lights
Continuous lights, sometimes known as “hot” lights, are either on or off. Once it’s on, it stays on, unlike the flash on your camera or phone.

The greatest benefit is that you can see how the shadows are falling on your scene while you adjust it. That way you won’t need to take multiple reference shots before the perfect setup is dialed in.
Additionally, you can use continuous light for either photos or video. This gives the choice an element of versatility.
On the market, you can find fluorescent, incandescent tungsten, and LED bulbs. The best LED lights for product photography are more expensive but have features that make it worth the extra expense.
For example, LED lights don’t generate as much heat as incandescent bulbs and a good one will have a dimmer. This allows you to adjust the light intensity without having to move it farther away.
Continuous lights are pretty much the go-to option for a beginner, and truly are a great place to start. They're also the best option for phone cameras since phones cannot yet connect to external flashes - the technology just isn't there yet (at least at the time of posting this in 2021)!
A frequently asked question is whether ring lights are good for product photography. The short answer is...maybe. Ring lights have been a boon for YouTubers and creators because they're fabulous at lighting faces. However, they aren't as good for product photography because they aren't well-diffused and the round shape can cause bizarre glare spots that are hard to edit out. The same problems occur when you use a ring light for food photography.
If you already have a ring light and want to use it for product photography, we recommend shining it through a diffuser like a shear sheet or the scrim of a 5-in-1 reflector set.
External Flashes
External flashes look similar to continuous lights but instead of being plugged in, they are wirelessly connected to your DSLR to only flash when you click the shutter. The "external" part means that they are positioned off-camera and not attached to your camera. External flashes are more common in three or four-point lighting for product photography.
The main benefit of a flash is power. A high-voltage capacitor releases a large charge in a short burst. With this power, you won’t have to increase the shutter speed or ISO or widen your aperture to get the brightness you want.
External flashes are amazing when you want to capture subjects in motion, like water drops, sprinkling sugar onto a food photo, or "freeze" cloth blowing in the wind. If you try to capture the same motion using a continuous light, you usually need to use a very fast shutter speed which can lead to dark photos.
However, it’s an investment. You will also need a transmitter to sync your flash to your camera shutter. And, as i mentioned before, they can't sink to a phone shutter...at least not in 2021.
Types of dIffusion
You might have a high-end, high-wattage bulb. But unmodified direct light will cause reflections, hotspots, and hard shadows. The function of diffusers is to diffuse, soften, and direct light for a more appealing photo.
Here we are going to look at the three main options: soft boxes, umbrellas, and scrims. We’ll also give some thought to reflectors.
Scrims
If you place a thin white sheet in front of your window to soften direct sunlight, you’ve just made your own scrim. These are the cheapest form of light modifiers.
They may be loose-edged or set in a solid frame. Either way, they need to be mounted.
Affordability makes them a good place to start if you are experimenting with what works for you.
Umbrellas
Because of their shape, umbrellas spread light subjects widely. This makes them closely mimic natural light. Though, it's not always the first choice to use umbrella lights for product photography.
They are well suited to shooting larger products like furniture, especially in the context of a room.
However, they aren’t suited for shooting small or medium-sized products because light is less focused and spills out the sides. Ideally, you want more control over the direction and quality of light.
Umbrellas make up for it in ease of use. They are collapsible and easy to transport. They are also cheaper than their alternative, the soft box.
Soft boxes

Unlike an umbrella, a soft box gives you greater control over the direction of light because soft boxes are closed and don't allow light to spill out the sides. They can easily be placed close to the product to enhance edges and colors.
They come in myriad shapes and sizes. It’s not immediately obvious which lighting soft box to choose. So let's break down your options!
Size
The advantage of a large box is that it creates the softest light by spreading light out over the largest area. It can also cover a larger area if you're shooting a large subject.
You’ll want to go for a bigger box if you’re shooting larger products, but it’s still useful in shooting smaller objects if you want well-rounded and even lighting, for example, if you’re shooting jewelry.
A smaller box allows you to play with slightly harder shadows. You can use them to create more dramatic images. Smaller boxes are also best for small spaces since large boxes take up a lot of space when in use and in storage.
Shape
Soft boxes come in octagons, rectangles, and strips. Having a variety to pick and choose from is great, but there is not too much difference for the most part.
Octagonal and round boxes give a nicely shaped "catchlight" in portraits. This is reflection you see in the subject's eyes. A round-ish catchlight is optimal for portraits looks most like the sun. In contrast, a square catchlight in the subject's eyes would give it away that they're being photographed in a studio!
For product photos, however, square or rectangular soft boxes are your best bet, especially if photographing reflective objects. With this shape, reflections will be rectangular which looks most like a window!
Strip soft boxes are great for crafting light across specific areas of a shot. This is definitely a more advanced technique. Otherwise, they aren’t as versatile as a rectangle.
So for product photos, we suggest a rectangular box to start off with.
Reflectors and Foam Boards
Have a couple of reflectors (or boards) on-hand no matter how many lights you have. They allow you to fine-tune the light across all sides of your product.
For more on using reflectors, check out this how-to.
Lighting Techniques in Product Photography
There’s no one way to take brilliant product photos. Shooting a large piece of furniture is going to require a different setup than a wristwatch. It’s a game of experimentation, patience, and experience. Here are some guidelines to help.
White Background Cut-Outs
This is a mainstay of most eCommerce websites. The product is set on a perfectly white background.
You need an edgeless white backdrop to achieve this. Something like the infinity curves seen in large studios can be accomplished on a smaller scale with a good rigid white backdrop.

The second key ingredient is knowing how to light a white background. Aside from your key and fill light, it helps to separately light the background. This will remove any shadows being cast by the product and ensures an even tone.
Here’s where you can fall short if you are only using one or two lights. More time and effort has to go into editing out the background using photography software.
If you only have your key and fill light, position them at 45-degree angles on each side of the camera. This way they will cancel out most of each other’s shadow.
Photographing Jewelry
Jewelry is tricky to shoot because it’s highly reflective and multi-faceted. You’re likely going to spend a lot of time adjusting your focus and aperture to capture the object and not the background.
A good way to start is to use a white background. This removes distractions and highlights the piece.
You will also need soft, diffuse light. A medium to large overhead soft box is a standard way to get good results.
Photographing Textured Products
Think of leather bags, a perfectly baked cake, or hand-carved wooden ornaments. Part of the appeal of items like these is the fine textures and patterns across their surfaces.
To capture these features, you need to play with hard and soft lighting and angles.
A front-on and diffuse light source will flatten the object.
A nearby and powerful light source to the side will cast harder shadows in patterning in the textures. Combined with a darker background, you can create a moodier feel with this.
There is no single answer for how to light products. But hopefully you now know where to start so that you can find your style and tell the story of your brand. With some practice, I'm confident you'll start creating photos that tell your story the moment your viewer lays eyes on them.
Did you find our blog helpful? Then consider checking:
- How To Get Good Lighting For Product Photos
- How To Take Pictures At Night
- How To Get Good Lighting For Pictures
- How To Take Low Light Photos
- How To Get A Perfect White Background In Product Photography
- Best Size Backdrop For Photography
- Photo Compositions to Know
- Depth Perfection
- Light + Airy Photography
- Dark + Moody Photography
- Food Styling
- Product + Flat Lay Styling
- Clothing Photography
- Drink Photography: The Splash Technique
- Your Ultimate Photo Resource
