While I continue to embroider, I’m going to skip ahead just a bit for those of you following me in order to learn how to make a actual bliaut. The embroidery is always the longest part and I do plan for that, but watching me make every flower and leaf and vine is a high price to pay for getting a pattern. Even for me. Let’s get to the dress, already.
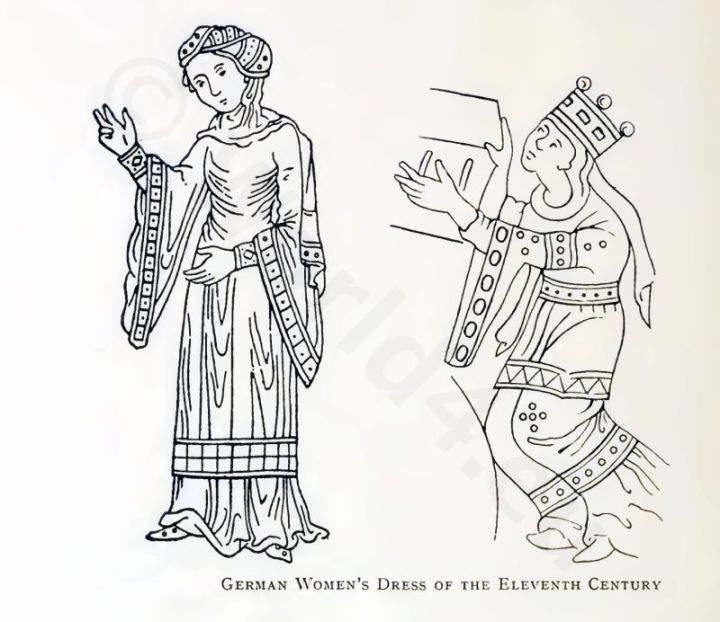
I’ve given you a history of the bliaut, which was worn for about half a century, the first half of the 12th century. It’s been a mystery just how they made the garment to get it to fit the way we see depicted in the famous statuary of Chartre Cathedral. I’ve been on a quest to understand this most misunderstood garment for decades. And then I’m going to reinterpret it for SCA uses.
Let’s begin on why the bliaut looks the way it looks. What has confused historian and costumers for centuries is the seemingly different section in the middle of the gown. It almost looks like a different dress in the mid section. Victorian romantics thought it was a seperate girdle on the dress, later historians thought the dress was made in three parts, upper bodice, mid waist and skirt, virtually impossible in the 12th century. They didn’t know how to seperate the bodice from the skirt. What has been confusing people for all these many years is fairly simply explained. When the bliaut came into fashion was during the Christian Crusades. What came back was silks never seen in Europe before. Lovely, delicate, light silks in fabulous colors (silk dyes well). Who wouldn’t want a dress from a beautiful China silk or a sheer silk gauze? Well, if they were anything like me, the answer was everyone wants a beautiful silk gown, and every lady who could afford it probably had one.
Now, the sewing skill of the period was rudimentary at best. Most garments were loose and unfitted, held by belts for both men and women. The difference between the rich and the poor was the quality of fabric and the embellishment on the garment. Not in the style. Until the bliaut.
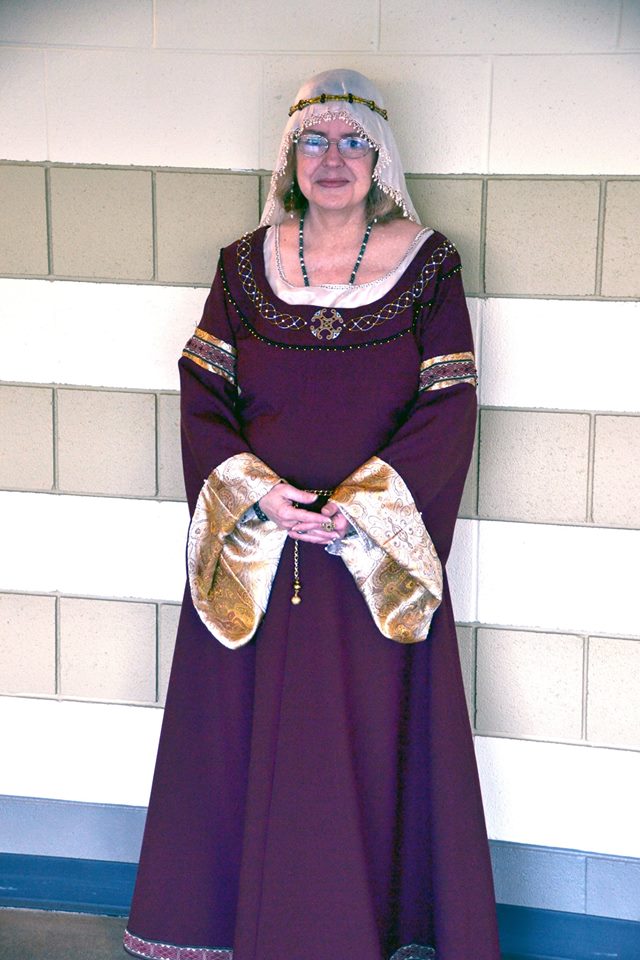
The bliaut was different. It was the first well fitted garment for women. It was a style that flattered both the female form and the fabulous fabric it was made from. The long sleeves looked angelic, but also were a affectation of the nobility. With sleeves like those, you aren’t expected to labor. Trust me, you can’t actually work in sleeves like the long angel wing sleeves favored in the period. But you could show off how much fabric you could afford. They take a lot more fabric than normal sleeves and the longer they are, the more fabric they take to make. Some such sleeves I’ve made take 4-5 yards of fabric alone. If that isn’t wearing a Porshe, I don’t know what is.
The dress mid section, the mysterious mid section is explained by understanding how fabric works in certain stresses. The bliaut was made to fit by lacing up both sides tightly, from under the arms to the hips. Light fabrics, when they’re laced, bunch up unless the side seams are reinforced with boning or a sturdy fabric. Light silk fabrics, or light fabrics in general, use lacing like gathering. The tighter the sides are pulled, the more the fabric would gather making a “roushed” look to the middle of the dress.
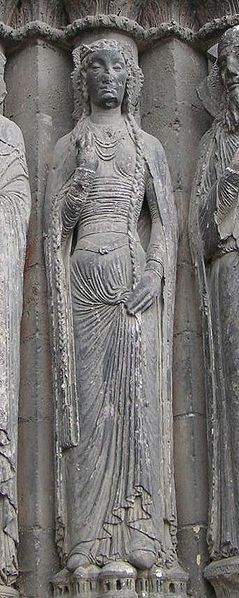
The skirt is made larger (and having that pleated look) by adding fabric gores to the skirt in both the front sides and back. The gores are basically triangles of fabric added to the front, side, and back seams to create a wider skirt. They can be inserted without seams as well, which is “advanced gore technique” to me, inserting gores into the skirt of the dress between the seams. The idea is that the more you distribute the fabric in a circle skirt, the better it will drape. And, the bigger the skirt, the more fabric it takes to make it and we’re back to conspicuous consumption medieval style. Of course, light silk would drape close to the body as shown in the statuary, being the nature of the fabric.
When we remake the bliaut in different fabrics, sturdier ones than were originally used, the dress looks different from the original depictions. With a sturdier fabric that has more strength and body, the roushing effect disappears and the skirt has more body and fans out from the hips rather than hugging them. It’s all about how different fabrics work even using the exact same pattern. The same pattern that creates the figure hugging, narrow bliaut of the pictures creates a priness style silouette in a sturdier fabric.
I actually have two bliaut patterns and I’ll share both with you. The first pattern is a historical pattern, fitted as medieval bliaut, by lacing up each side. This style dress needs a full underdress to wear like a chemise cut similarly, but made larger. The neck is made the same way I made my necks for my bliaut pattern, by using a contrasting facing technique that I promise to include in my writings further on.


The second pattern is my own bliaut pattern. There are a few differences. Instead of gores, I cut the skirt including the gores in one piece, distributing the fabric of the circle to the front, sides and back. Adding that fullness to the front skirt gives the wearer that nice drape in front that hides a multitude of body issues. I can also tailor this dress all around for a better fit, which I always do once the dress is put together. The other difference is that this dress, with this fitting, can be made to fit well, but not need to be laced in order to achieve that. It can be a slip on dress and still look great. That also means it doesn’t necessarily have to have an underdress, The summer bliaut I’m making will be one layer but made to look like the traditional two. I don’t deal with the summer heat and I need a nice piece of garb I won’t melt in.


I’ll get more into the specifics of measuring for the bliaut and sewing details later. For those of you who want to jump ahead, feel free. I’m always available for questions. Get inspired! Until next time.
