Now, my dear readers, I am excited to share with y’all the initial work (the timing is finally right ) on this tree. I’ve missed the opportunity for a couple of years but now is the perfect time so….here…we…go!

Its a pretty big trident maple. It has potential. I got it for the base really.
To tell the truth, it’s only real outstanding feature is the size.
It’s going to take years to develop and I’ll have to pull out all my tricks to make it interesting. Otherwise people will walk up to it and say “Wow, that’s a big tree!” And walk away.
It has some flaws 
The higher branches are a bit big.
 Some of the movement is odd.
But it has that cool base
And the more its in a shallow container, the flatter that base will become.

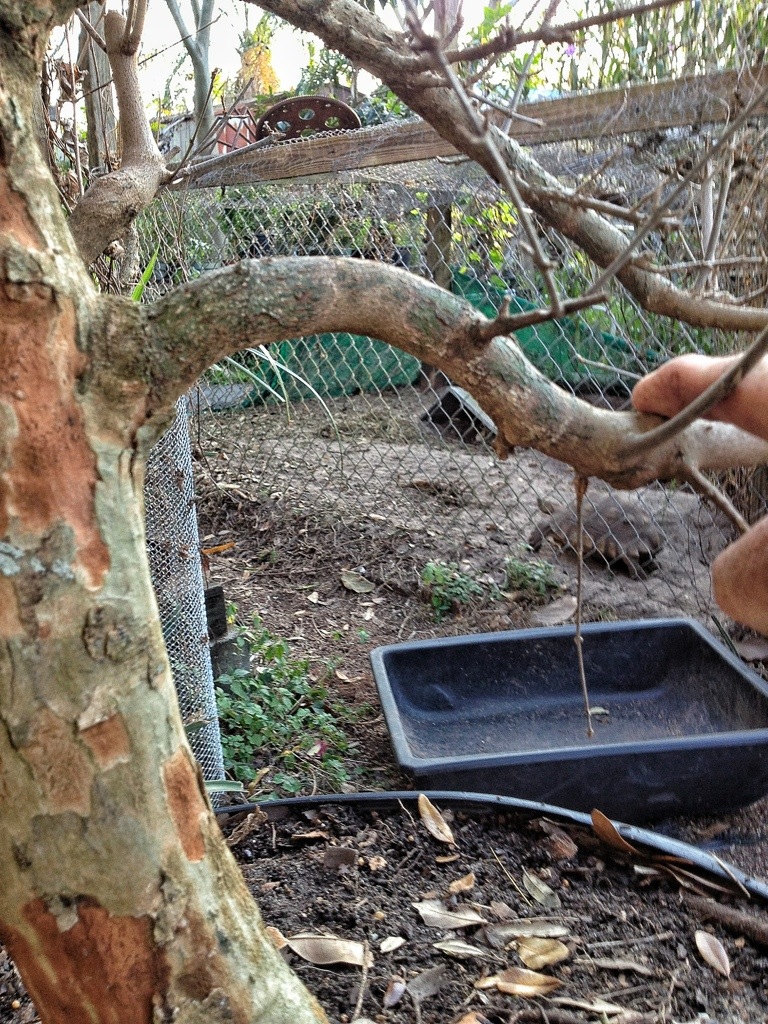
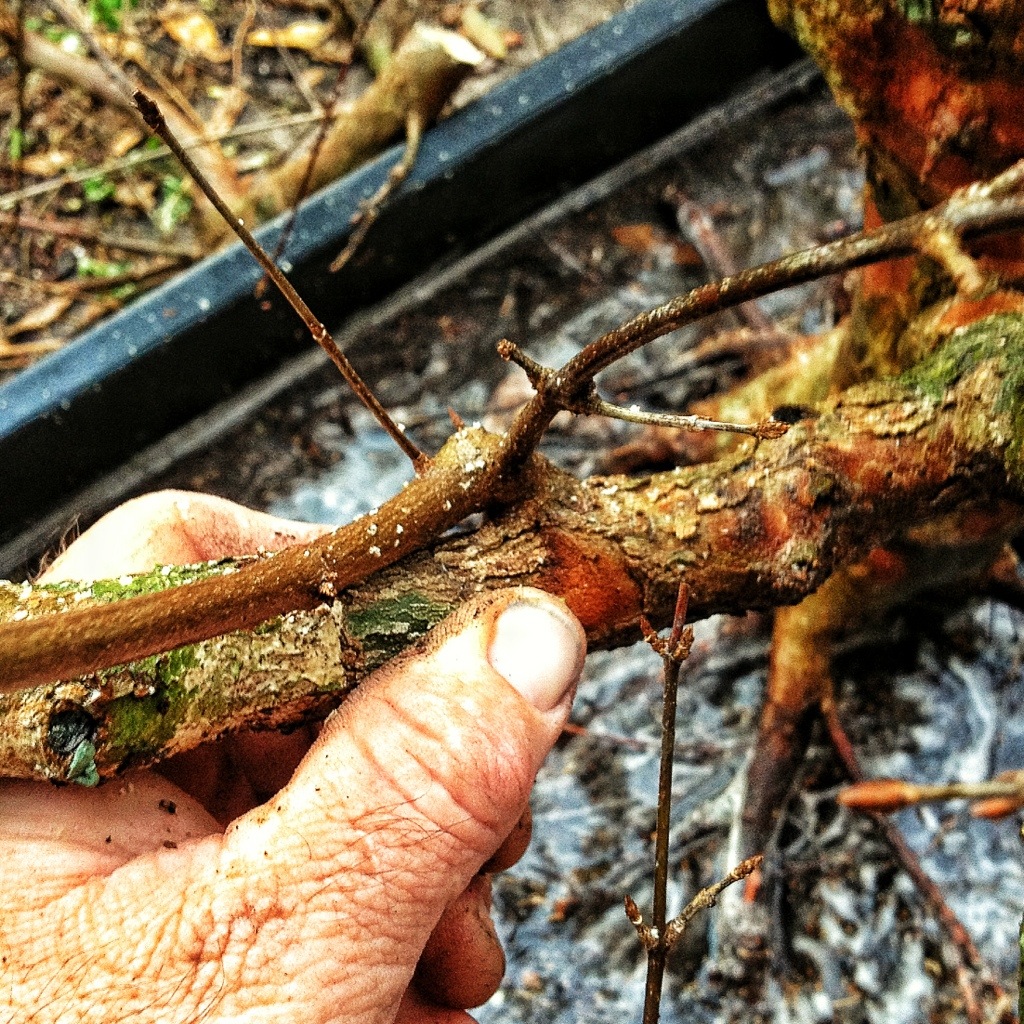
A big branch is not a flaw, per se, but this has no taper to it. I’ll have to cut it just to the left of my finger to that branch. I have trees that are smaller than that wound will be. 
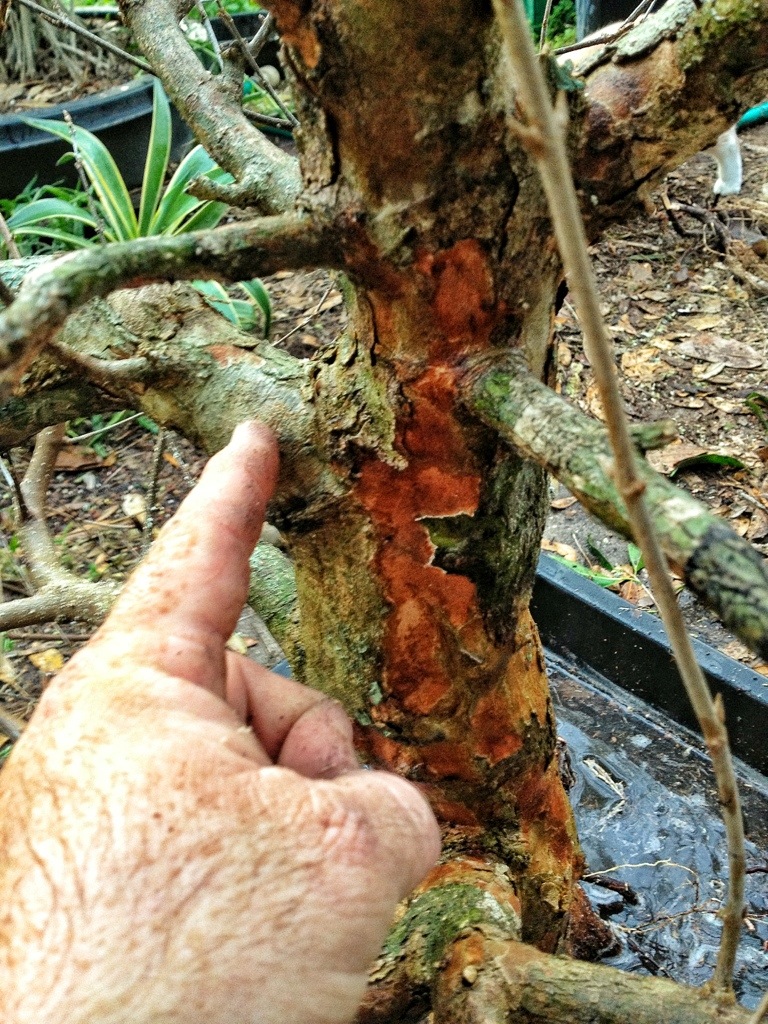
The biggest flaw with the tree is this area of reverse (inverse to you Europeans, and Ryan) taper.

For some reason it doesn’t show up well in the picture. It’s there though.
 I could just cut it here and grow a shorter tree. I’ll think about it.
I think the reverse taper was caused because of the callous above that branch being a major chop site.
This tree was grown in the ground for 15-20 years and was pruned periodically.
 But sometimes a trident will just grow in odd ways too. The trident maple doesn’t seem to care too much for our bonsai sensibilities. It’s a very challenging species to grow if you don’t know where to cut and at what time.
 The tridents best characteristic is its ability to heal (callous) over wounds. This branch is healing over the end of a stub. Without a shoot feeding it. Strange.
 While this tree was in the ground, the training consisted of just tying the branches down. Which was not bad, but it tends to give the branches a bow shape.
 To relieve that too-regular bow shape I will cut back to this branch.

My tortoises in the background.
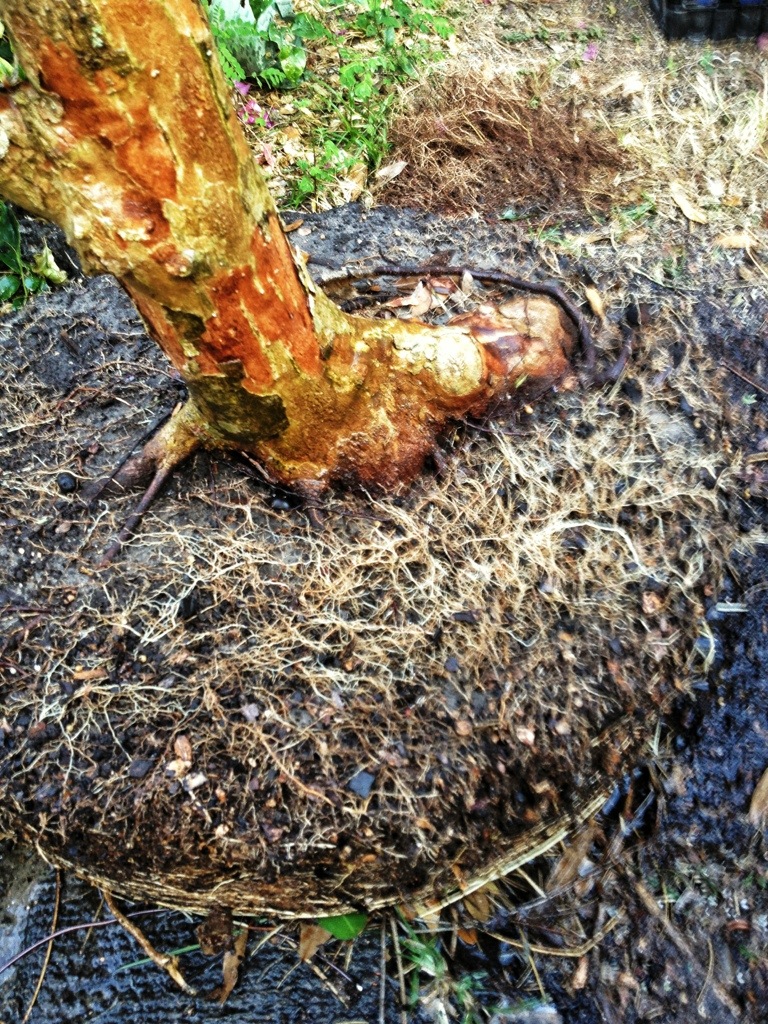 Now the roots.
The “soil” looks like actual soil. Dirt. Sugar sand to be precise.

I need to wash out all of that and replace it with good bonsai soil.
 Which is not that easy. I’m already standing in a muddy puddle.
 But a little electric power persuasion (Yes,standing in a puddle! I’m a hardcore bonsai man grrrrrrr!)
 And, slowly, the tortoise wins the race (see that? I used an earlier reference to put an image in your head. Damn I’m good)

Gotta break out the big root cutters. I call this The Enforcer (cuz I’m a hardcore bonsai…..wait, I used that joke already. Sorry)

And…done. I didn’t show what I did there, did I?
It was way too dirty and wet to take pictures. Sorry.
Ok…I’ll draw some pictures for you.
 This was basically the root system.
There were big knobs at the end of the roots. Just as though they had been cut and healed.
If you remember, I said the tree had been field grown. In the last two years, before I got the tree, the grower changed techniques. He dug up all the trees and encased the root system in a wire cage/felt material and set that contraption on the ground. The way it works is the roots will grow through the felt and into the ground. It seems as though a tree can sense what is underneath it and will stop growing if there is no place to go. This “tricks” the tree into growing but, since the felt can only allow feeder roots through, the main roots stay within the cages framework.

This, on the trident, seems to be the result.

What I didn’t get pictures of was the cutting of the knobs off.

And it kinda looks like that. There was only one big root that didn’t have any secondary feeder roots on it. But it should be ok.

There’s a view looking down from the top. Overall, a good distribution of roots around the base and good white feeder roots too.
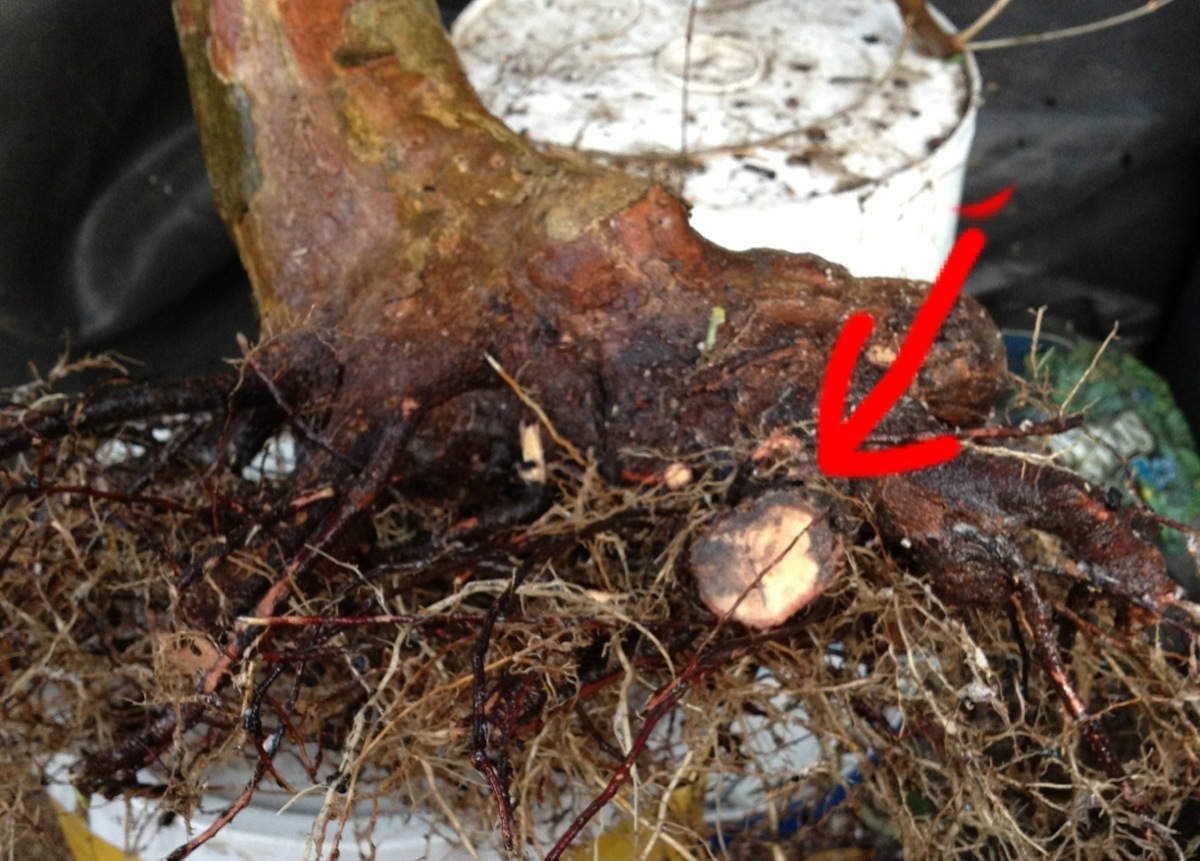 That’s the biggest root I had to cut out.

Branch pruning. If you notice I have not potted the tree yet (it’s easier to move this way, sucker is heavy) so I’m letting it sit in a tub of water so the roots don’t dry out while I’m chopping the tree back.
Since I’m only only doing basic cutting I’ll only touch on what I’m doing and give a few pointers. This is very simple pruning. No wire at all yet, not until summer at least.

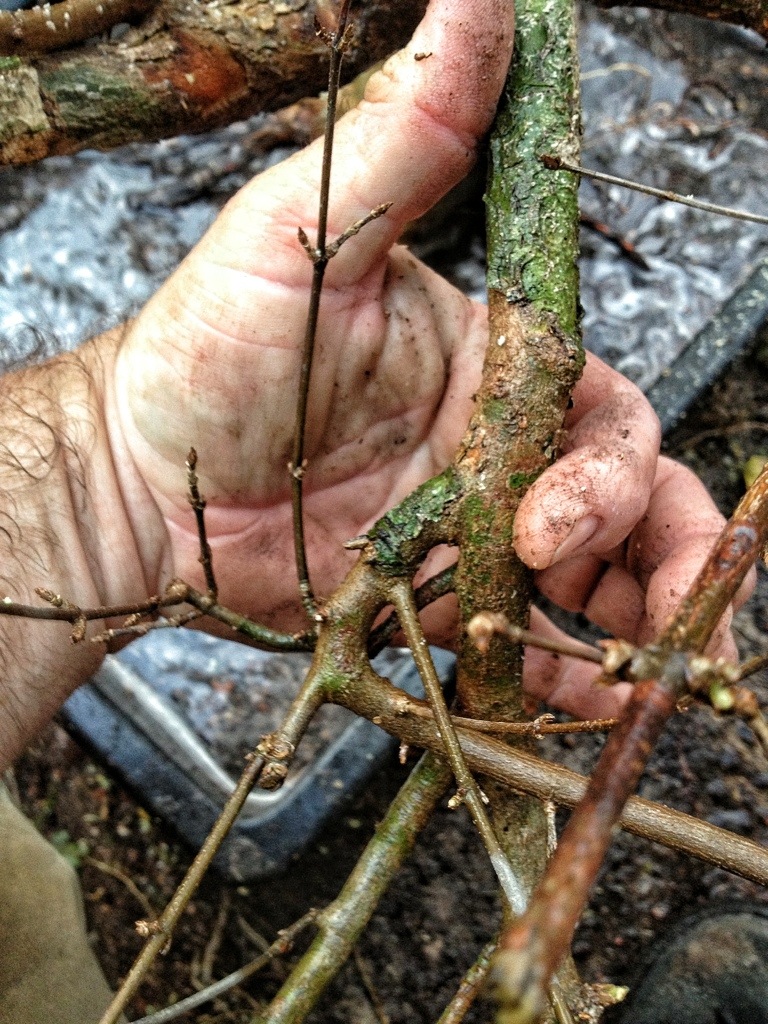
This is basically the front. The branch structure is very haphazard.
 The limbs are all akimbo. Like when I’m drunk and I fall down the stairs.
 To fix it I’ll have to do some serious chops; since this tree is so big it will be akin to doing 4 or 5 trunk chops. It will survive though. And heal.
This big one goes.
 I’ll incorporate that cut into the carving I need to do.
Looking closely the structure is actually great for these big chops to look natural.
 This will be a very interesting branch when it grows out.
 This one too.
One major cut spot is on the top
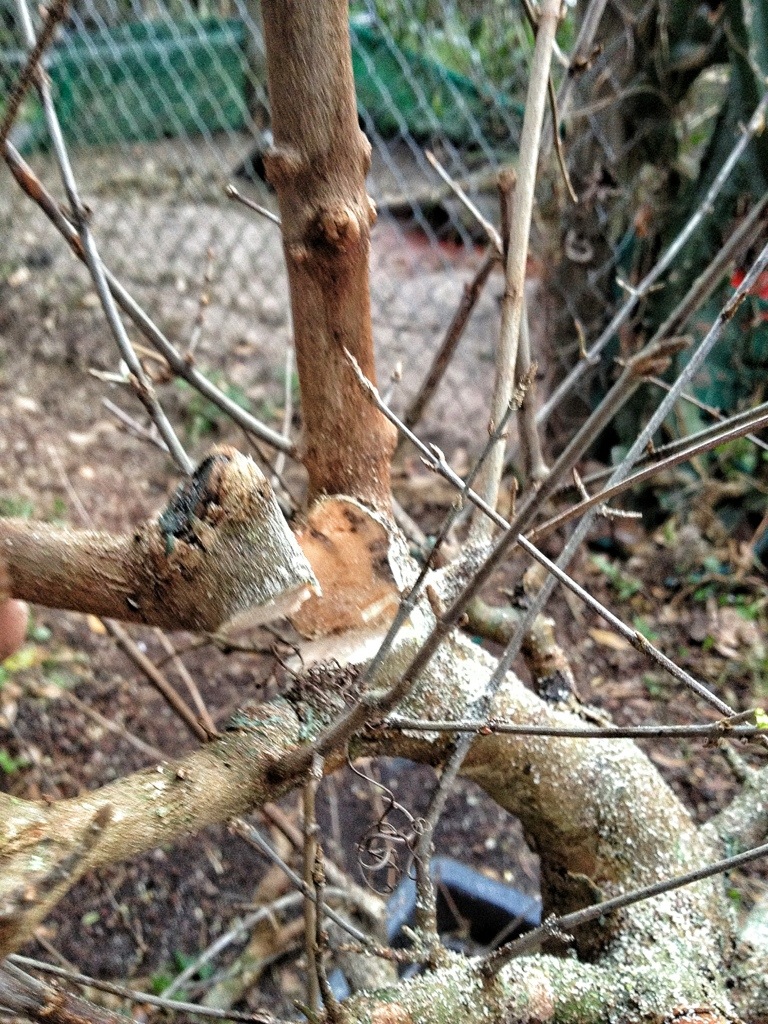
I literally wedged that branch out using a saw.
 Then I cut the lead branch and the front branch, for taper.
The trick to speeding the healing: on every cut I used a sharp knife and smoothed the cuts. I mean really smooth. And then I seal the edges so the cambium layer does not dry out, which allows the healing to start at the cut site and not 1/4 of an inch away.
Almost done. I’m running out of daylight.

Here’s the pot. It’s deeper than the final pot will be, but that should facilitate quicker growth.
My wife says it looks like a bathroom sink. My wife loves me.

And there it is.
Kinda dim (the lighting, not my wit). I know. Bad pic. Sorry.

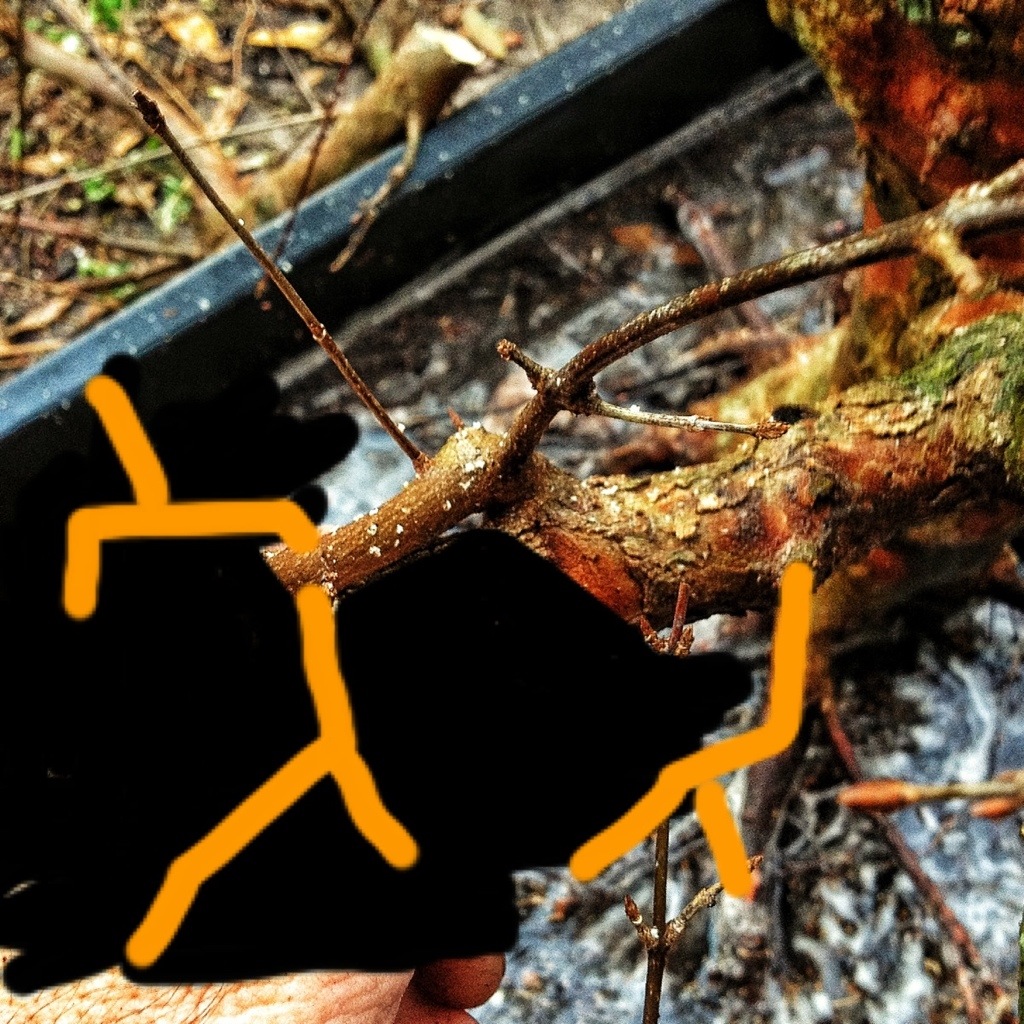
The red arrowed branch may go; to be replaced with the yellow one below.
The lavender arrow shows the carving site (which I’ll probably do in the summer).
The green arrow….. I’m not sure why I put the green arrow there. But it is pretty, don’t you think?

Here it is in the morning. I’m not sure you can see it any better.
I cut almost all the branches and twigs back to one bud and removed those buds that I thought were unneeded.
The aftercare: I used good bonsai soil; my basic mix. I used a pre-emergent weed preventer (Preen is a good brand)
I also (contrary to what I generally do on a deciduous tree after repotting) fertilized. I use a fertilizer called Milorganite. It’s naturally derived and not harsh.
I want strong growth on this tree, not rampant. But the sooner it’s making its own food (through photosynthesis ) the better. That means a healthy tree and quicker developement. That’s all until (like I keep saying) probably summer.
And since I don’t have anything else exciting for you, I made a sketch to show you the trees potential future. Unless I decide to chop it at the first branch of course.


Nice presentation Adam, I wish I could grow tridents down here in the south
LikeLike
Thanks Charles.
LikeLike
Great blogs! Where do you get all the time to do everything you do?!?!?
LikeLike
I don’t sleep much.
LikeLike
Bonsai and a brewski – what more does a guy need? (oh, yeah power tools). Thanks for another great read!
LikeLike
Bonsai and Martinis! A great read, I’ll agree!
LikeLike
I think I am finally starting to “see” what you are explaining in all of your posts. Always fun, the before and after, but the drawings of what you hope the tree to become is so helpful to really understand how all the cuts work.
LikeLike